Getting your feet wet
CIRCAD has an easy to use and intuitive user interface. Most of the commands are two letter functions such as <PL> for Place Line, or <GC>
for Grab Component. This section will give a brief overview of some of the basic functions. The first thing you will see when you invoke CIRCAD is the title page
against a grey background, and the main menu bar across the top of the page. The title page will disappear when you begin working in the program, but the grey
background is something you'll be seeing a lot of -- it is essentially the workbench on which you'll be building your circuit boards.
You will see the cursor also: a small arrow. If you press the space bar or Enter, the cursor becomes a pair of x and y cross-hairs. When using CIRCAD
you'll use the cross-hairs when working on the "bench'', but you'll use the arrow to make menu selections. A third cursor for data entry will be introduced shortly.
For all functions and operations, the left mouse button is equivalent to the Enter key. When the CIRCAD cross hairs are engaged the right mouse button is equivalent
to the Escape key with the exception of a click and hold which is an alternate method of panning. The right mouse button is equivalent to the Escape key.
Note that in addition to using the mouse, you can move the cursor with the arrow keys on the keyboard. This is a useful feature for precisely placing components and
tracks, but the mouse is essential for speed and for the large movements required to use the menus.
The chief purpose of CIRCAD is to place, move and modify tracks and components on the circuit board. To facilitate this, each CIRCAD command involves two parts:
1) the action, and
2) the object of the action.
For instance, you can either place, grab, edit, or delete something. That something can be a line, a pad, a component, or a piece of text, for example:
Virtually all CIRCAD commands, therefore, are basically composed of two words.
The main menu bar displays the choices for the first word of the command. Clicking on one of the choices displays a pop down menu that lists the choices for the
second word of the command. If, for example, you wanted to place a line, you could click on Place in the main menu, and then on Line in the pop down menu.
Command shortcuts
Note that a single letter in each of the selections is underlined. This introduces another useful feature of CIRCAD: you can perform menu selections with the
keyboard as well as with the mouse. As you grow more proficient with the program, for instance, you may find it quicker to place a line using the keystrokes <PL>
rather than by clicking on Place and Line off of the menus with the mouse. This holds true for the other selections on the menu as well, although it may not always
be the first letter of the selection that is underlined.
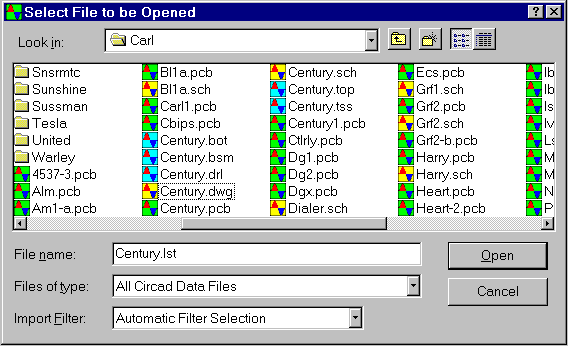
To experiment with CIRCAD and its features, you must first open a file. Engage the Windows cursor and cause the main menu bar to appear, then move the arrow
cursor to the first selection, File. Press left mouse or Enter to display the pop down menu. Move the cursor to Open and click on it again, and a dialog box
(not attached to the top of the screen) appears.

At the top of this dialog box, the "Look In" field will show the current folder you are working from. The various sub directories and files are listed below in the file list
box.
Left mouse the folder named DEMO and double click it to open the sub directory. Then scroll down to the file named FL1-C.PCB and click on it to open it for
processing.
When the file is loaded, a demonstration circuit board will be displayed on the screen, automatically zoomed to the largest size that will fit on the screen.

